Chives are one of those herbs that make you feel like you have your life together. You snip a handful, dinner instantly tastes brighter, and the plant just keeps coming back like a friendly neighbor who always waves. If you have ever wanted an herb that is both beginner-friendly and genuinely useful, chives are it.
Chives at a glance
- Common name: Chives
- Botanical name: Allium schoenoprasum
- Plant type: Perennial herb (comes back year after year)
- Hardiness: Cold-hardy in many regions (commonly grown as a perennial in USDA zones 3 to 9)
- Flavor: Mild onion, fresh and grassy
- Best part: Leaves and edible blossoms
- Sun: Full sun to part shade
- Indoor friendly: Yes, especially on a bright windowsill
- Bonus: Flowers are pollinator magnets and a quiet little kitchen flex
Where to grow chives
I grow chives everywhere I can justify them. A patch in the garden bed, a pot by the back door, and usually a smaller pot indoors for winter snips. Chives adapt beautifully, but they are happiest when you match the pot or bed to how you plan to use them.
In garden beds
Chives are wonderful edging plants. They form neat tufts, they are easy to harvest, and when they bloom, the purple pom-poms make even a very practical veggie bed look intentional. Plant them where you can reach them easily, because you will harvest often.
In containers outdoors
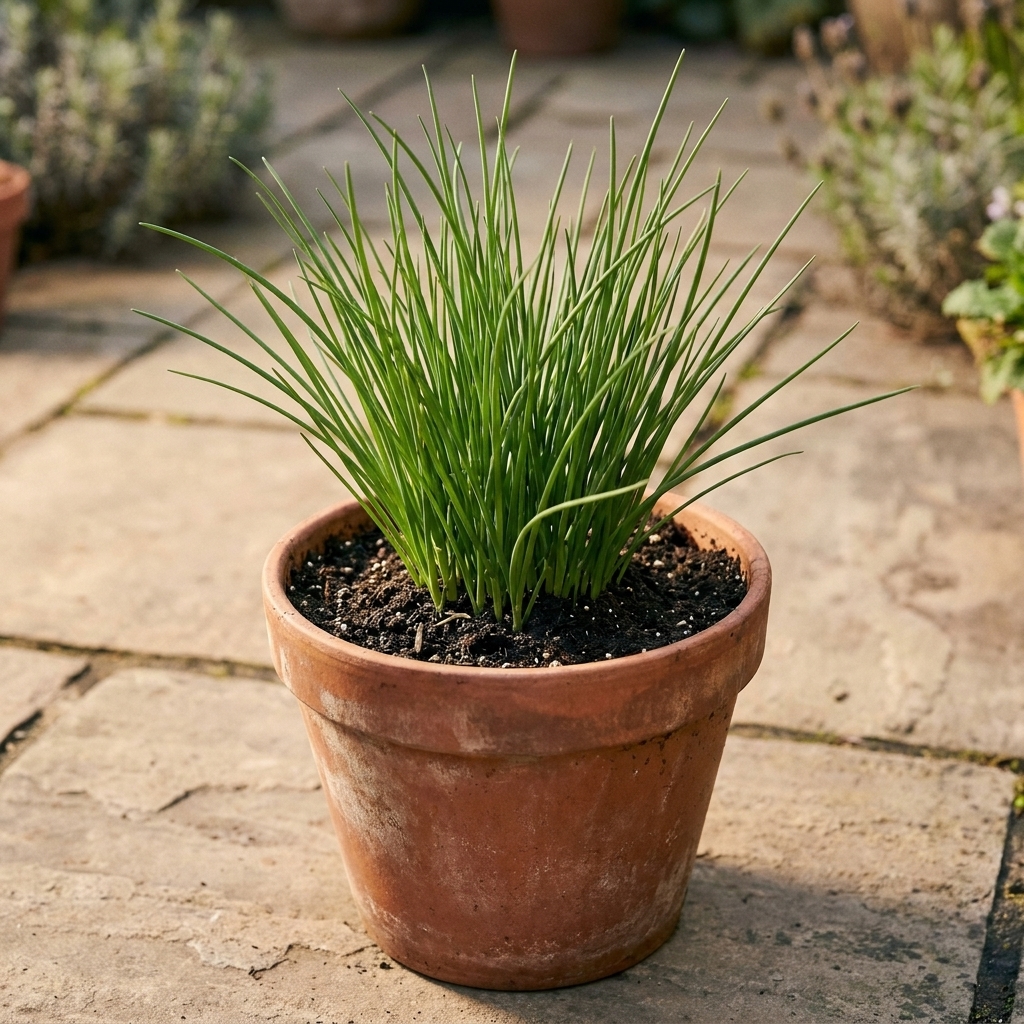
If you are short on space or dealing with heavy clay soil, containers are a dream. Use a pot with drainage holes and a quality potting mix. A 6 to 10 inch pot works for one plant, but chives naturally expand into a clump, so bigger is better if you want less frequent dividing.
On a sunny windowsill
Indoors, chives like a bright window and consistent moisture. A south- or west-facing window is ideal. Rotate the pot every week or two so the leaves do not lean hard toward the light.
- Pro tip for indoor success: If your chives look thin and floppy indoors, they often need more light. A small grow light can make the difference between “surviving” and “snip-worthy.”
Light, soil, and water
Sunlight
Chives grow best with at least 6 hours of sun, but they tolerate part shade, especially in hot climates where a little afternoon protection helps keep leaves tender.
Soil
Chives are not fussy, but they do love soil that drains well. In beds, mix in compost to improve texture and fertility. In pots, use potting mix, not garden soil, to avoid compaction.
Watering
Think “evenly moist,” not soggy. Water when the top inch of soil feels dry. In summer containers, that may be daily. In garden beds, deep watering once or twice a week is often enough, depending on heat and rainfall.
- What overwatering looks like: Yellowing leaves and a tired-looking clump.
- What underwatering looks like: Thin leaves, browning tips, and slow regrowth after cutting.
Planting chives
Starting from seed
Chive seeds are small, and the sprouts look like tiny green threads at first. Start seeds indoors 6 to 8 weeks before your last frost, or direct sow outdoors once the soil has warmed.
- Sow seeds about 1/4 inch deep.
- Keep soil lightly moist until germination.
- Thin or separate seedlings so they are not crowded.
Planting nursery starts
If you want quick gratification, starts are the way to go. Plant at the same depth as the pot they came in.
Spacing
In beds, give plants about 8 to 12 inches. They will slowly expand, and you will thank yourself later when it is time to divide.
Harvesting chives
The best thing you can do for chives is use them. Regular cutting encourages fresh new leaves.
When to harvest
Once leaves are about 6 inches tall, you can start snipping. For outdoor plants, this is often in spring and continues through fall (timing varies by region and weather).
How to harvest
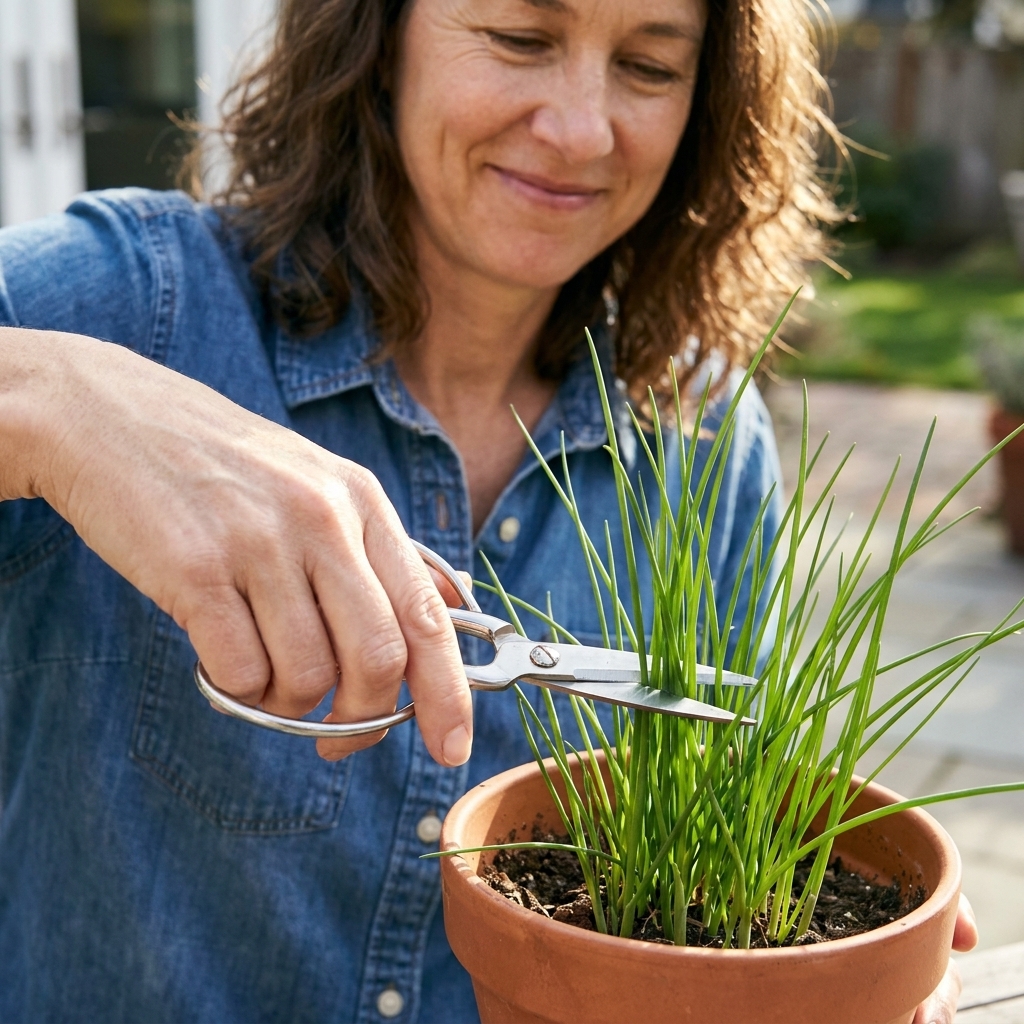
- Use clean scissors and snip leaves about 1 to 2 inches above the soil line.
- Cut from the outside of the plant first, letting the center keep growing.
- Avoid cutting the entire plant down to the ground too often. Leave some green so it can photosynthesize and rebound quickly.
How much to take
A gentle rule is to harvest up to about one-third of the plant at a time. In peak season, chives regrow fast enough that you can harvest frequently without stressing the plant.
Dividing chives
Chives naturally form dense clumps. After a few years, they can get crowded, which means thinner leaves, slower growth, and sometimes a tired-looking center. Dividing is like a reset button.
When to divide
- Best seasons: Early spring as growth starts, or early fall when heat eases.
- How often: Every 2 to 4 years, or whenever the clump looks crowded and less productive.
How to divide
- Water first. Water the plant a few hours before dividing. Damp soil makes the roots easier to work with.
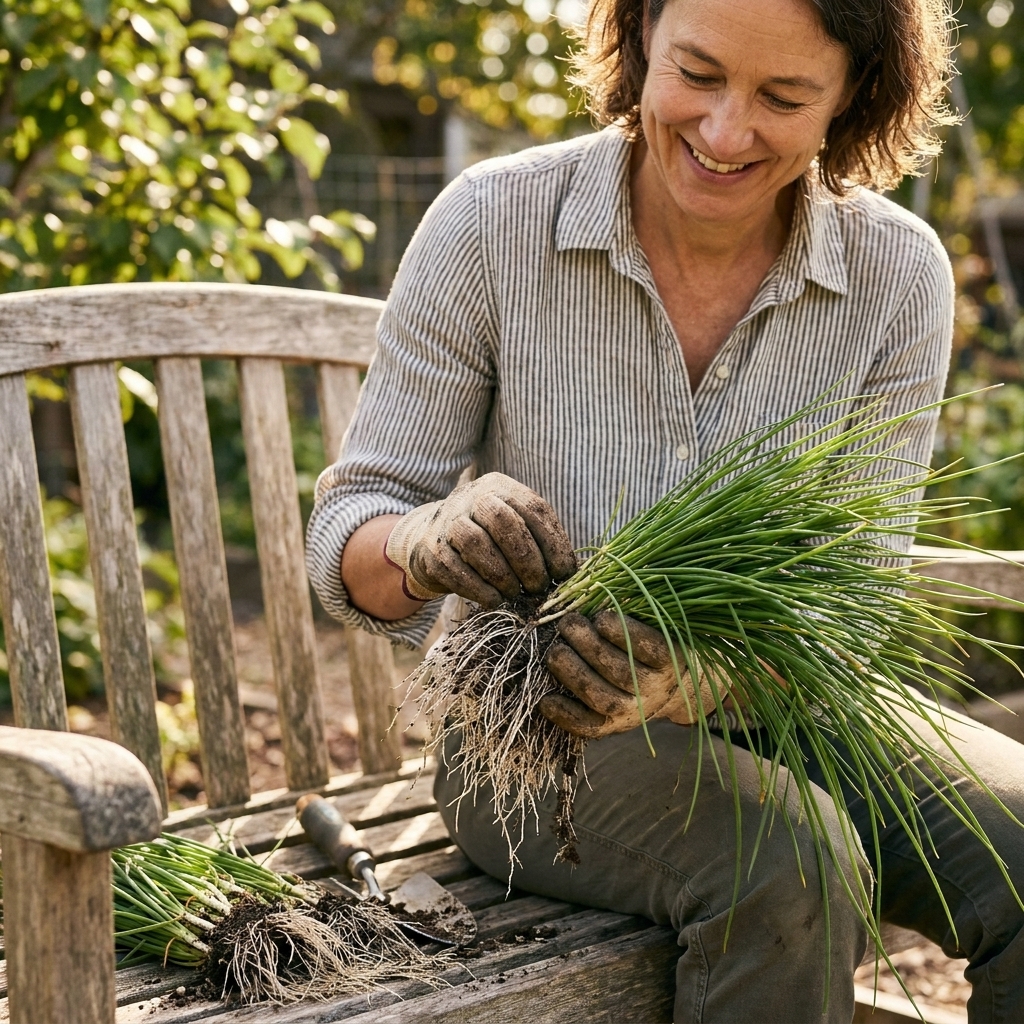
- Lift the clump. In a bed, use a garden fork or shovel to lift the whole root mass. In a pot, slide it out and loosen the edges.
- Pull or cut into sections. Use your hands to gently tease sections apart, or use a clean knife to slice the clump. Aim for divisions with a healthy set of roots and several shoots.
- Replant promptly. Plant divisions at the same depth they were growing before.
- Water in well. Keep the new divisions evenly moist for the next week or two as they settle.
If you have more divisions than space, this is your moment to become the neighbor who gifts herbs. Chives are one of my favorite “here, take this” plants.
Chive blossoms
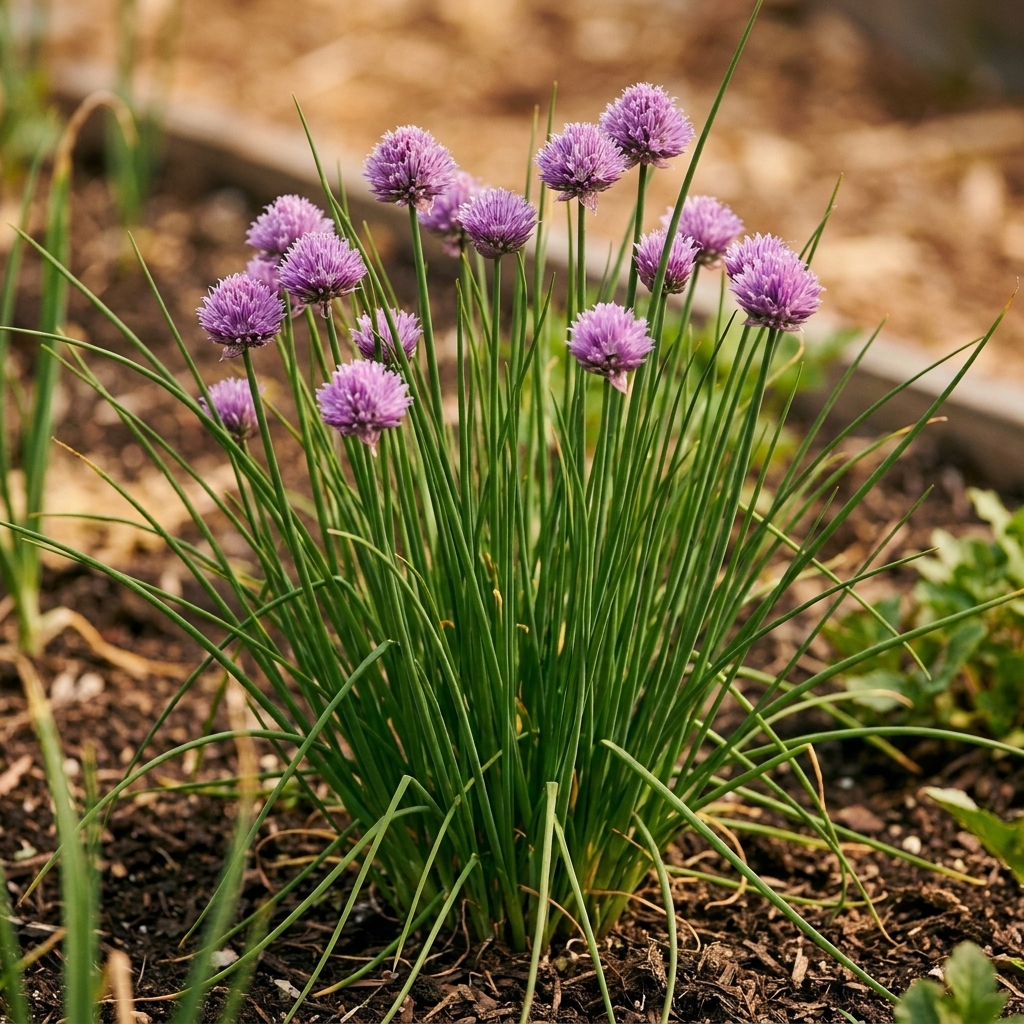
Chive flowers are edible, fragrant, and peppery-mild. They taste like chives with a soft floral note, and they make even a plain bowl of potatoes look like it came from a cafe.
When chives flower
Most chives bloom in late spring to early summer, though timing depends on your climate. Each flower is a round globe made of many tiny florets.
How to harvest blossoms
- Cut flower heads when they are fully purple and just opened, before they start fading.
- Snip the stem a few inches below the flower head.
- Gently shake out any tiny hitchhiking insects, especially if you are harvesting from an outdoor bed.
How to cook with blossoms
- Salads: Pull apart florets and sprinkle over greens.
- Eggs: Fold into scrambled eggs or sprinkle over omelets right before serving.
- Potatoes: Toss florets into potato salad, mashed potatoes, or roasted baby potatoes.
- Butter: Mix chopped florets into softened butter with a pinch of salt.
- Vinegar: Steep blossoms in vinegar for a beautiful, lightly oniony infusion.

Chive blossom vinegar
If you want one simple way to preserve the magic of chive blossoms, make a small jar of infused vinegar. It turns a bright pink-purple and feels like capturing spring in a bottle.
What you need
- 1 clean glass jar with a lid
- A handful of chive blossoms (rinsed and fully dried)
- White wine vinegar or champagne vinegar
How to make it
- Lightly bruise the blossoms with your fingers to help release flavor.
- Fill the jar about 1/3 to 1/2 with blossoms.
- Pour vinegar over the blossoms until fully submerged.
- Seal and let steep in a cool, dark spot for 1 to 2 weeks.
- Strain and store. Use on salads, roasted vegetables, or anywhere you would use a bright, tangy vinegar.
Safety note: Rinse blossoms and let them dry completely before they go into the jar (extra water can dilute the vinegar). Keep everything clean. If anything smells “off” or looks cloudy in a way that concerns you, toss it and start fresh.
Common problems
Yellowing leaves
- Likely causes: Overwatering, poor drainage, or an old crowded clump.
- Try this: Let soil dry slightly between waterings, improve drainage, and consider dividing.
Thin, weak growth
- Likely causes: Not enough light, nutrient-poor soil, or crowded roots.
- Try this: Move to brighter light, top-dress with compost, and divide if needed.
Rust or fungal spots
- Likely causes: Humid conditions and poor airflow.
- Try this: Remove affected leaves, thin crowded plants, and water at the soil level. If you do use overhead watering, do it early in the day so foliage dries quickly.
Pests
Chives are in the allium family, and many pests leave them alone. That said, they are not invisible. Aphids can show up on flower stalks, and in some areas onion thrips or allium leaf miner can also be an issue.
- Try this: Start with the simplest fix: a strong spray of water and removing badly infested growth. Keeping plants well spaced and harvesting regularly also helps keep chives tidy and less attractive to pests.
Overwintering
In the ground
In many climates, chives die back in winter and return in spring. Once hard frost hits, you can trim dead leaves back and mulch lightly. Then forget about them until the first green shoots pop up again.
In containers outdoors
Pots get colder faster than the ground. If winters are harsh where you live, move pots to a sheltered spot, insulate the container, or bring a smaller pot indoors.
Indoors for winter snips
You can bring a pot inside and keep it growing with enough light. If indoor growth slows, that is normal. Some plants also do better with a cool rest period, so if yours looks exhausted indoors, let it nap: move it somewhere cooler (like an unheated garage or cold frame) and water less until you see new growth again.
Storing your harvest
Fresh
Wrap chives in a slightly damp paper towel and store in a bag or container in the fridge. Use within a week for best flavor.
Freezing
Chives freeze beautifully for cooking. Chop, spread on a tray to freeze, then store in a freezer bag. The texture goes limp when thawed, so they are best sprinkled into hot dishes straight from the freezer (soups, eggs, potatoes) rather than used as a fresh garnish. You can also freeze chopped chives in ice cube trays with a little water or olive oil for easy cooking portions.
Drying
You can dry chives, but they lose a lot of their charm. If you have the option, freezing keeps more of that fresh onion flavor.
Quick FAQ
Do chives spread?
They spread by slowly enlarging into a clump. They are not usually aggressive, but they do appreciate division every few years. They can also self-seed if flower heads mature and drop seed, so deadhead spent blooms if you want to avoid surprise seedlings.
Should I let my chives flower?
Yes, especially if you want blossoms for cooking and pollinators in the garden. If you want the plant to focus on leaf production, you can snip flower stalks off as they appear. Removing blooms also helps prevent self-seeding.
Can I eat the whole flower head?
You can eat the florets. I usually pull florets off the head and sprinkle them, since the central stem can be a bit tough.
Why do my chives taste strong sometimes?
Older, thicker leaves can taste sharper. Snipping regularly for tender new growth keeps the flavor mild and sweet.
A small herb, big payoff
If you are building confidence as a gardener, chives are the friend you want in your corner. They forgive missed waterings, they bounce back after harvest, and they give you two gifts in one: those bright green leaves and the edible purple blossoms. Plant them once, and future-you will be snipping little handfuls of flavor for years.